Как настроить эквалайзер в соответствии с частотными характеристиками каждого инструмента/голоса?
: 14839
: 2022-04-27 18:09:01
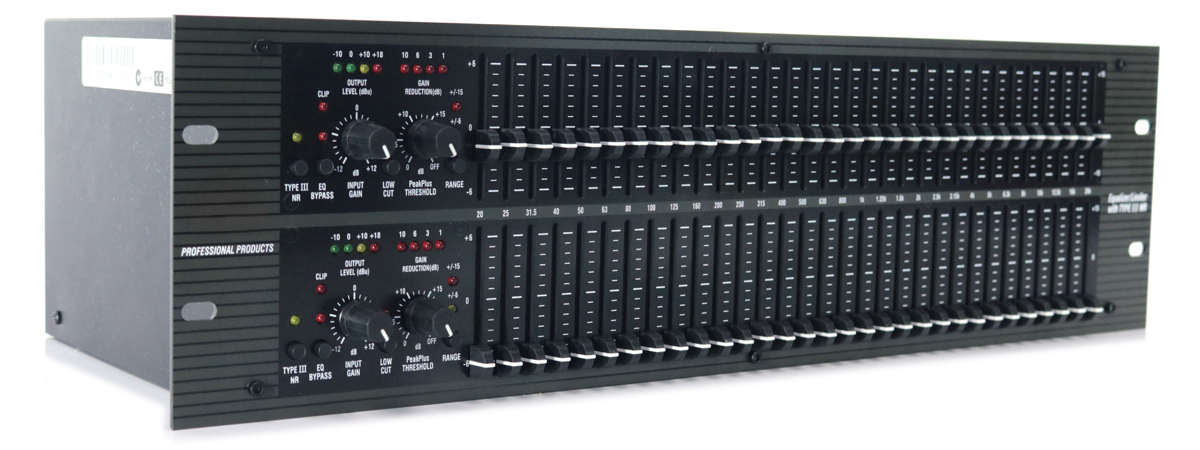
Using the equalizer, you can adjust the volume of a certain part of the frequency band or the whole frequency band of the sound wave to make the sound of instruments/vocals more beautiful. For example: attenuate low-frequency components below the low end of the frequency range of the recorded instrument to reduce low-frequency noise, such as low-frequency leakage, rumble of air conditioners, and banging of microphone stands. So we need to know the frequency range characteristics of each instrument/vocal/other sound sources in order to better adjust and play the role of the equalizer!

The following are the frequency band characteristics of each instrument/vocal:
Double bass: fullness and depth in 60Hz ~ 100Hz. Rumble at 600Hz, presence at 2.5kHz, and string noise above 3kHz. Attenuating components around 200Hz to 500Hz can make the sound clear.
Electric guitar: The pluck sound is at 60Hz, the fullness is at 100Hz, the popping sound is at 500Hz, the liveness or sharpness is at 2kHz ~ 3kHz, and the squeak or harsh sound is above 6kHz.
Drums: the fullness is 100Hz-200Hz, the drum sound is blurry at 250Hz-800Hz (can be attenuated within this range), the trivial and useless snare drum sound is at 1kHz-3kHz, and the percussion sound is at 5kHz. Attenuate toms around 600Hz to reduce the boxy sound. Boosting 10kHz~12kHz can make the dull cymbal sound more delicate and crisp.
Bass drums: The fullness and strength are lower than 60Hz. Between 300Hz and 800Hz, it is a kind of paper tearing sound (attenuating the components of 400Hz to 600Hz can make the sound better), and the click and percussion sounds are between 2kHz and 6kHz.
Saxophone: Warmth at 500Hz, harshness at 3kHz, key noise above 10kHz.
Native guitar: fullness or strumming at 80Hz, presence at 5kHz, and strumming noise above 10kHz.
Acoustic guitar miniature microphone pickup: In order to make the guitar sound more "acoustic", it can be attenuated in a narrow frequency range of 1.2kHz to 1.5kHz, and some high-frequency components may be attenuated.
Vocals: Male voice fullness is 100Hz~200Hz, female voice fullness is 200Hz~400Hz, humming or nasal sound is 500kHz~1kHz, presence is 5kHz, hissing sound (“s” and “sh” sounds) 3kHz ~10kHz.
Example: A vocal track sounds overly rich or rumbled. You can use the low frequency equalization knob (for example, at 100Hz) to attenuate until the sound you hear is natural. For another example, if the sound of the snare drum is too dull or suppressed, you can adjust the mid-frequency equalization button and boost it between 5kHz and 10kHz until the sound of the snare drum is clear and crisp.
Don't pause when making equalization adjustments to the approximate frequency range you need, and continue to use full boost or full attenuation to make the effect more clearly audible. Finally, go back and fine-tune it until you find the sound balance you are most satisfied with.
If your instrument is buzzing, muffled, or harsh, but you don't know where to start to adjust the EQ. At this time, you can choose a frequency-selectable equalizer, first increase its boost to the extreme, and then select frequency bands one by one until you find that the timbre of the selected frequency band matches the timbre of the problem. Finally, the equalization of this frequency band is attenuated until the sound returns to normal.
In general, avoid excessive boosting, as doing so has the potential to distort the signal. So sometimes when you need to boost the high frequency without distorting the signal, you can try to attenuate the low frequency to achieve the purpose of boosting the high frequency. To reduce the turbidity of the sound or enhance its clarity, it can be attenuated by 1-2dB around 300Hz. Either fade each instrument, or fade the entire mix. At the same time, care should be taken not to boost their EQ by putting every instrument on the same frequency.
Related Product:
Contact Us:
 sales2@sinbosen.com
Whatsapp:https://api.whatsapp.com/send?l=en&phone=8616676738225


The following are the frequency band characteristics of each instrument/vocal:
Double bass: fullness and depth in 60Hz ~ 100Hz. Rumble at 600Hz, presence at 2.5kHz, and string noise above 3kHz. Attenuating components around 200Hz to 500Hz can make the sound clear.
Electric guitar: The pluck sound is at 60Hz, the fullness is at 100Hz, the popping sound is at 500Hz, the liveness or sharpness is at 2kHz ~ 3kHz, and the squeak or harsh sound is above 6kHz.
Drums: the fullness is 100Hz-200Hz, the drum sound is blurry at 250Hz-800Hz (can be attenuated within this range), the trivial and useless snare drum sound is at 1kHz-3kHz, and the percussion sound is at 5kHz. Attenuate toms around 600Hz to reduce the boxy sound. Boosting 10kHz~12kHz can make the dull cymbal sound more delicate and crisp.
Bass drums: The fullness and strength are lower than 60Hz. Between 300Hz and 800Hz, it is a kind of paper tearing sound (attenuating the components of 400Hz to 600Hz can make the sound better), and the click and percussion sounds are between 2kHz and 6kHz.
Saxophone: Warmth at 500Hz, harshness at 3kHz, key noise above 10kHz.
Native guitar: fullness or strumming at 80Hz, presence at 5kHz, and strumming noise above 10kHz.
Acoustic guitar miniature microphone pickup: In order to make the guitar sound more "acoustic", it can be attenuated in a narrow frequency range of 1.2kHz to 1.5kHz, and some high-frequency components may be attenuated.
Vocals: Male voice fullness is 100Hz~200Hz, female voice fullness is 200Hz~400Hz, humming or nasal sound is 500kHz~1kHz, presence is 5kHz, hissing sound (“s” and “sh” sounds) 3kHz ~10kHz.
Example: A vocal track sounds overly rich or rumbled. You can use the low frequency equalization knob (for example, at 100Hz) to attenuate until the sound you hear is natural. For another example, if the sound of the snare drum is too dull or suppressed, you can adjust the mid-frequency equalization button and boost it between 5kHz and 10kHz until the sound of the snare drum is clear and crisp.
Don't pause when making equalization adjustments to the approximate frequency range you need, and continue to use full boost or full attenuation to make the effect more clearly audible. Finally, go back and fine-tune it until you find the sound balance you are most satisfied with.
If your instrument is buzzing, muffled, or harsh, but you don't know where to start to adjust the EQ. At this time, you can choose a frequency-selectable equalizer, first increase its boost to the extreme, and then select frequency bands one by one until you find that the timbre of the selected frequency band matches the timbre of the problem. Finally, the equalization of this frequency band is attenuated until the sound returns to normal.
In general, avoid excessive boosting, as doing so has the potential to distort the signal. So sometimes when you need to boost the high frequency without distorting the signal, you can try to attenuate the low frequency to achieve the purpose of boosting the high frequency. To reduce the turbidity of the sound or enhance its clarity, it can be attenuated by 1-2dB around 300Hz. Either fade each instrument, or fade the entire mix. At the same time, care should be taken not to boost their EQ by putting every instrument on the same frequency.
Related Product:
 |
 |
 |
 |
Contact Us:
Whatsapp:https://api.whatsapp.com/send?l=en&phone=8616676738225


